My friend Gemma mentioned the other day that our local Willow Wood hospice shop is having to shut early or not open at all due to lack of volunteers :(. Now I've finished my A levels I have more time on my hands so I decided to get back into doing 'my bit' and helping out when I can.
I've not long finished this morning's shift, it was easy enough getting back into the swing of things - even though I haven't volunteered since last summer. It was a bit quiet and lonely today, not so many customers, so I tidied up and dusted then sorted through donations. Not had a chance to do my favourite job yet - 'steaming', don't know why but everyone fights for their chance with the steamer... :o
I'm back in tomorrow, looking forward to it - plus Gemma works Saturday's.
Friday, 27 June 2014

Saturday, 21 June 2014
The Fault in our Stars....sniff, sniff...
Finished reading John Green's 'The fault in our Stars'........pretty heartbreaking to say the least as it's about two teenagers who fall in love when they meet at a cancer support group. So not to do things in half measures,my friends and I watched the film today, (nothing like a double dose of angst...) I won't give away the ending..... WAAaaaaaaaaa!!!!!

Needless to say I watched and evaluated 'The fault in our Stars' purely for media research - it had NOTHING to do with the main character 'Augustus Waters'....
Who am I kidding - Love you Ansel :) :), here's the film trailer - get the 'Kleenex' ready.
Needless to say I watched and evaluated 'The fault in our Stars' purely for media research - it had NOTHING to do with the main character 'Augustus Waters'....
Who am I kidding - Love you Ansel :) :), here's the film trailer - get the 'Kleenex' ready.
Thursday, 19 June 2014
A2 Fine Art Exhibition
I went back into college yesterday to prepare some of my Unit 4 artwork for tonight's private Fine Art Exhibition.
Here's a couple of photographs displaying some of my 'Multiple Images' Fine Art final pieces.

As you can see my friend and model Gemma, features quite a lot in my work :).

The bottom piece of work is my 15 hour exam piece, featuring multiple images of Gemma. Displayed in a 'Triptych' style, using acrylic paint and gold embossed metal sheeting - inspired by the artist's Gustav Klimt and Alphonse Mucha.
Influenced by Renaissance and more modern imagery, I used adapted traditional and Photoshop digital techniques, plus some iPhone Applications, to help produce several interesting and unusual multiple image artworks.
Friday, 13 June 2014
Friday 13th - Salford Uni and Jeremy Kyle = Lucky for some :)
Today has been a very LONG but interesting day - spent entirely at Media City - Salford Quays. I had to get up really early this morning and take the Metrolink from Piccadilly to Media City so I could be at Salford University for 9am.
I'd enrolled on their 'Create at Salford Festival 2014 - Enquirers and Applicants Discovery Day, together with their Television and Radio undergraduate course Taster Session'. I was really lucky to grab the last taster session ticket as this was only for a limited number of applicants.

I was really excited and nervous to begin with but felt a little easier as the morning progressed with a tour of the uni's £2 million studios and their HUGE green screen. 'Ash' our tutor, let us familiarize ourselves with the cameras and other equipment, which I jumped at the chance to have a play with, then found out the camera's alone cost MANY tens of thousands of £'s!
Today's taster session was so much fun, giving me great insight to the types of equipment used in television production - something I'm unfamiliar with as having only just finished my 'Media Studies' A level course, the only equipment we used was a Canon camera - still made a great film trailer with this though :).
Before the show even started this studio experience was a real 'eye-opener' I noticed there was a large production team, mostly younger people (Runner's I think) not much older than myself, who helped with general tasks such as greeting and showing everyone to their seats, health and safety making us aware of some of the equipment and wires, also warning us about the 'mikes' above our heads - so had to be careful what we said to one another.....(can hear everything :)) They encouraged us to laugh, cheer and boo if we felt like it during filming and took photographs to further make our experience more enjoyable and memorable.
There were lots of different types of camera, including a hidden one looking straight at the audience. Several 'time served' camera operators - the only female one working the hidden camera.
After the 'warm up' jokes Jeremy came onto the studio floor - he's really easy going and very funny.
Jeremy then introduced and explained how he'd been working with a famous couple called the 'Speakmans' that morning and how they had used several techniques (to be shown on their forthcoming show on July 14th), to help him overcome his intense fear of spiders, other large insects and snakes. We the audience were then shown some VT taken this morning, showing Jeremy diving across the other side of the stage when faced with the creepy crawlies etc. We all laughed, it was funny watching Jeremy actually scared of something when he battles with people on a daily basis.....then the Speakmans were introduced onto the stage, followed by the spiders, creepy crawlies and snake.... I have to say not nice :(. Eyes fixed on Jeremy, he didn't budge from the stage and was perfectly fine with holding the giant spider. Something he couldn't have done without the help given earlier by the Speakmans.
Anyway to kick things off we were shown more VT announcing the Speakmans future show showing how they help many people trapped and burdened by their individual fears. Next we, the audience, had to pretend that we had watched the earlier show and that there had been a break and the show was beginning again, so we had to stand, clap and cheer. Then Jeremy did his usual 'signing off' speech.
I'd enrolled on their 'Create at Salford Festival 2014 - Enquirers and Applicants Discovery Day, together with their Television and Radio undergraduate course Taster Session'. I was really lucky to grab the last taster session ticket as this was only for a limited number of applicants.
I was really excited and nervous to begin with but felt a little easier as the morning progressed with a tour of the uni's £2 million studios and their HUGE green screen. 'Ash' our tutor, let us familiarize ourselves with the cameras and other equipment, which I jumped at the chance to have a play with, then found out the camera's alone cost MANY tens of thousands of £'s!
Today's taster session was so much fun, giving me great insight to the types of equipment used in television production - something I'm unfamiliar with as having only just finished my 'Media Studies' A level course, the only equipment we used was a Canon camera - still made a great film trailer with this though :).
Trying hard not to be intimidated (the uni's television camera's are HUGE, but surprisingly quite easy to navigate), I'm glad I was 'hand's on' as it didn't take me long before I felt comfortable using the camera. I only panned and zoomed in on a subject, but really happy I had a go, I had a great time :).
The added bonus of this morning's taster session was meeting and chatting with tutors and staff plus like-minded potential applicants :).
After a quick lunch, it was time to queue for ITV's Jeremy Kyle show. I couldn't believe how quickly I received 'first come first served' audience tickets - I only enquired last week :).
The only drawback was having to queue in the ITV building for what seemed like hours. My feet are still 'killing me'... Thankfully we all got through the checkpoint to take part in the afternoon studio audience :) :).
 |
| The studio team took our group photograph for the Jeremy Kyle facebook page - I'm middle right with 'hands' in front of my face. |
There were lots of different types of camera, including a hidden one looking straight at the audience. Several 'time served' camera operators - the only female one working the hidden camera.
After the 'warm up' jokes Jeremy came onto the studio floor - he's really easy going and very funny.
 |
| 'Jezza' image taken from the Internet. |
Anyway to kick things off we were shown more VT announcing the Speakmans future show showing how they help many people trapped and burdened by their individual fears. Next we, the audience, had to pretend that we had watched the earlier show and that there had been a break and the show was beginning again, so we had to stand, clap and cheer. Then Jeremy did his usual 'signing off' speech.
 |
| Image taken from the internet. |
This happened again when the show kicked off properly and Jeremy counselled/grilled the people who had come on the show to find answers to their problems.
It really interesting how the show is filmed in stages, not always flowing together, and how it's edited with clips showing the audience's reactions to Jeremy and the interviewee's with music and additional VT. Seeing the show made is totally different to what you finally see on screen - I'd love to have a go at editing again, I find this part of programme making really creative and interesting.
Finally, I think the best part of today, apart from me being let loose with expensive camera equipment, was when Jeremy had his photograph taken with a lovely elderly lady from our studio audience, 'Ivy' - she was 93 and kept saying how much she 'loved him'........:) (Ivy is front row centre on the above JK facebook page photograph :))
I've had a long but great day, my head is full of magic and my feet swollen but I've really enjoyed myself.
Thank god for cups of tea!!!! Cure's everything :).
Wednesday, 11 June 2014
18 and Exams are over !!!!!!!!!!!

18 - Finally.......:)
A double celebration as now completed all my A level coursework and exams, plus no more college :) :) :).
Sunday, 4 May 2014
Final photo shoot, exam preparation and Art and Graphics A Level Exam 'Final Pieces'
Graphics and Fine Art 15 hour exams are looming, so thought I'd better get cracking and take some more professional looking 'human' images for possible use in my work.
Yet again Gemma kindly agreed to be my model - she's helped me such a lot over the past 2 years. Before the shoot my mum helped with styling Gemma's hair, I applied her make up and supplied the dress and together with mum I helped fix a white bed sheet to the wall - for my backdrop. I wanted white because it would be easier to cut away Gemma's image from the background when using Photoshop.
Here's a couple of behind the scene's - taken by Mum...


Here are a few of MANY images taken today...
Graphics first:-
To kick off I asked Gemma to sit down while looking into the distance. I could possibly use this image for a 'Lil Bo Peep' nursery rhyme book cover. Perhaps place her on a hillside, with her lost sheep hiding behind her?

Here's my finished 'Lil Bo Peep' inspired Nursery Rhyme book cover. During part of the 15 hour graphics exam I had to create my hand drawn 'stock images', sheep sun, flowers, hat etc., for the background, plus publisher's logo. Using my favourite nursery rhyme style font, I put everything together including the book cover border, added colour, shade and tone using Photoshop software.

This is one of my favourite shots of Gemma. I asked to sit on a chair and hold her hands as if resting them on something. I have an idea about her sitting on Humpty Dumpty's wall :).

I'm really pleased with my 'Humpty Dumpty' inspired 2nd book cover. I like how it's a 'mystery' - did Humpty fall off the wall or was he pushed? If so, by who, Princess Gemma or the Sunflower's?

I used the same processes as my above 'Lil Bo Peep' cover.
Jonathan, my Graphics tutor, suggested that we add a few nursery rhyme style book pages as well as our book covers. It was a little intense trying to fit everything into the 15 hours but here are my 2 copies of Nursery Rhyme 'Introduction', 'Foreword' and 'Nursery Rhyme' pages.

'Introduction' pages are usually very simple, here I've added my own chicken and spider 'stock images' and favourite font, together my miniature version of my publisher's logo.
 |
Here are my 2 x 'Foreword' pages.

'Foreword' pages are usually written by the book publisher, explaining what the book is about and who it's designed for.

Here are my 2 x 'Nursery Rhyme' pages.

The exam specified that you could either create your own nursery rhyme or use traditional already created ones. I decided to use existing rhymes, as had more than enough work to do during my exam.

Again using my favourite font and my own 'stock images' (mouse, clock, teapot and cup/saucer) created and Photoshop enhanced during the exam, here I've managed to create simple but effective nursery rhyme pages.
It was really hard and the pressure was on during my 15 hour exam, I had to design and draw everything from scratch. However, once the 'ground work' was completed it was a little easier to create and put all my pages together.
I'm really happy with the final results, I think my book covers and pages appear professional, bright and colourful and would be enjoyable to look at and read.
Now for Fine Art and 'Multiple Images'.
I really like these shot's of Gemma because they're long, medium and close up images. I can use these for my 'Multiple Images' 15 hour exam.


I'm inspired by my earlier research and Renaissance style (fashion model) triptych, and by beautiful paintings of women created by artists such as Alphonse Mucha and Gustav Klimt. So I decided to create my own multiple image of Gemma, using both paint and metal shapes to add texture.
 |
| My 'Fashion Icon's' golden triptych |
 |
| Alphonse Mucha |
 |
| Gustav Klimt |
I only had 15 hours for my Fine Art exam, so unfortunately I didn't have time to take any photographs of my exam 'Multiple Image.
I decided to push myself and create quite a large piece of artwork. First of all I printed A3 size versions of my above 3 photographs of Gemma. Then during the exam I carefully cut around the print outs and arranged the images of Gemma so they overlapped one another on my paper.
 |
| Smaller test version using A4 images cut out and overlapping one another. |
Using 2 pieces of carbon paper taped together, sandwiched between the photographs and paper, I quickly drew over the cut out photographs leaving the copied images on the paper. I wanted my Gemma's to have 'halo's' same as the Renaissance and my modern fashion model triptych's. So using a mathematics compass I carefully measured from the middle of each of the Gemma faces to the top of the shoulders - then drew halo shapes around the heads.
 |
| Earlier rough carbon sketch and 'halo' practice. |
I then applied a 'wash' of multi-tonal orange acrylic to the paper background, in the same fashion as the above Alphonse Mucha image. Next I blended and added skin tone coloured acrylic to the Gemma's. With the majority of large paint areas covered that was 5 hours of the exam over already!
A week later, in between continuing with my additional final art pieces and finishing my sketchbook, I painted the dresses, halo's, roses and some of the hair, adding as much detail as possible - 5 hours flew by again!
The final 5 hours of the exam and the pressure was on... :(. I added more texture and tones to the Gemma's hair, painted shade and tone onto the images and added facial detail. With under a couple of hours left I then cut out circles of bronze coloured thin metal, using a special cutting machine, then proceeded to add texture and patterns to the metal shapes using a rounded pencil. I also spray painted random stationary objects such as treasury tags and paper clips in a gold colour.
With an hour left of the exam I quickly began glueing the metal shapes and objects to the golden halo's, mimicking the Klimt artwork style. Immediately this added so much texture and interest to my painting. With around 20 minutes to go, I wanted to add definition and texture in the same style as my earlier 'fashion model' triptych. I carefully applied black fine lines onto my paintings, defining the patterns on the dresses, the roses, hair and finally the faces. I wanted my triple Gemma's to look like Renaissance style subjects.
With about a minute to go I added a final highlight to the eyes on one of my multiple Gemma's and was then finally finished :).
I can honestly say I worked hard on my exam piece and am quite proud of the end result. I think I've managed to incorporate the different styles of my favourite artists while still sticking to a 'Multiple Image' theme.
Saturday, 26 April 2014
Unit 4 Fine Art Multiple Images - Photo shoot and working with Photoshop
Carrying on with the Multiple Image theme, my good friend Gemma, (who has helped with my AS and A2 Media Studies and now again with my A2 unit 4 Fine Art) agreed to be my model for a practise photo shoot. :).
I borrowed a Canon camera and tripod from college and using my living room as the studio, I made Gemma move and pose around the room, many MANY times - she was so patient :). The following are just a few of the hundreds of shots taken today.
First of all I wanted to experiment and recreate an Edweard Muybridge movement multiple image - trying saying that several times..........:)
Here's an example of his work taken from the internet:-

Muybridge was the first photographer to capture movement - he used several camera's in a line, set to capture each individual image as his subjects passed by. Muybridge was considered the inspirer of the first moving 'movie' films.
As I didn't have a large studio, to help me capture movement, poor Gemma was set the task of rolling about my living room floor. Fortunately today it's a lot easier to capture movement using the camera 'fast shutter speed', sort of like Muybridges line camera's in one.
Anyway, back to Gemma:-


I managed to capture this simple line of movement, when the images were cropped and placed together using 'Paint' I ended up with the following...

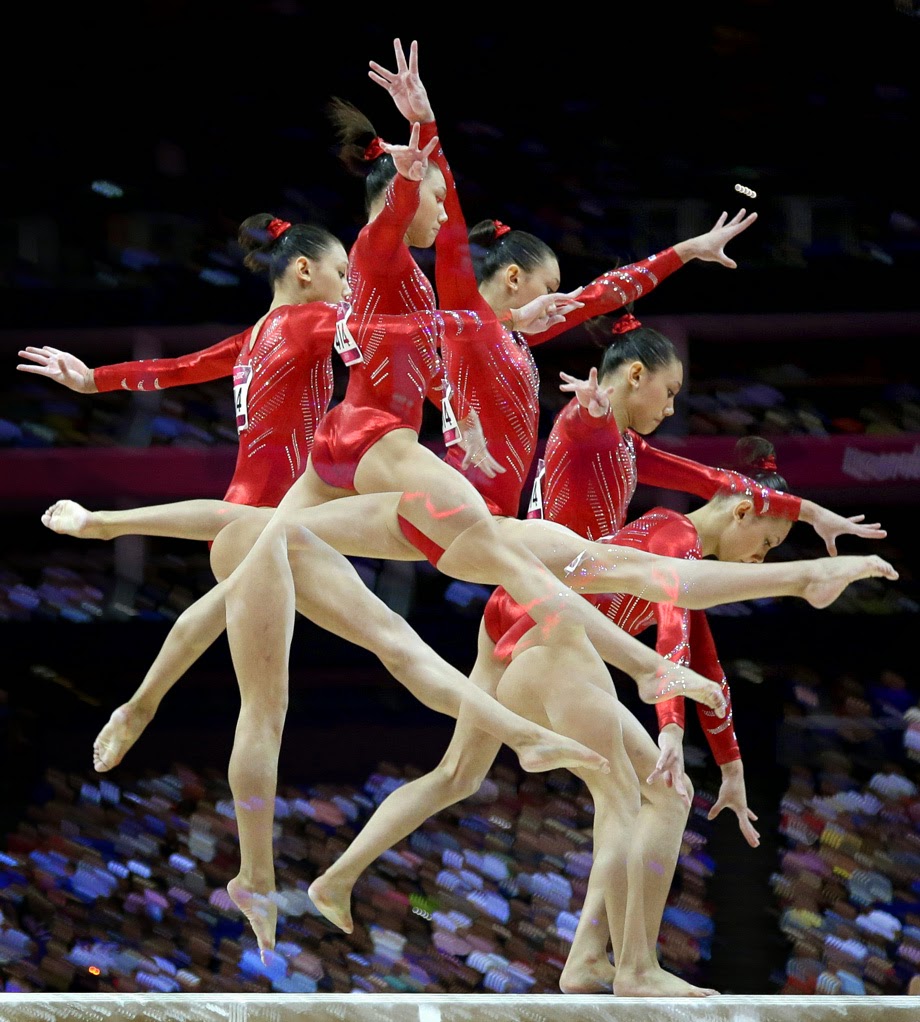
Next I wanted to create a more modern multiple exposure image, similar to those I had found when researching on the internet. This is one example:-

I took several shots of Gemma seated on the couch and chair, walking into the room and sitting on the carpet.




I've been researching a photographer called Christopher Relander. Using Photoshop he creates such simple but beautiful images by combining one subject, usually a person or animal, together with a flower or plant.
Here's an example of Relander's work:-


Using Photoshop I flipped the tree image upside down, then layered and carefully blended over my 'selfie'.
Cutting out the unwanted background and foreground parts and changing the colour of my head and shoulders to 'black and white', helped to create the following Relander style image.


I borrowed a Canon camera and tripod from college and using my living room as the studio, I made Gemma move and pose around the room, many MANY times - she was so patient :). The following are just a few of the hundreds of shots taken today.
First of all I wanted to experiment and recreate an Edweard Muybridge movement multiple image - trying saying that several times..........:)
Here's an example of his work taken from the internet:-
Muybridge was the first photographer to capture movement - he used several camera's in a line, set to capture each individual image as his subjects passed by. Muybridge was considered the inspirer of the first moving 'movie' films.
As I didn't have a large studio, to help me capture movement, poor Gemma was set the task of rolling about my living room floor. Fortunately today it's a lot easier to capture movement using the camera 'fast shutter speed', sort of like Muybridges line camera's in one.
Anyway, back to Gemma:-
I managed to capture this simple line of movement, when the images were cropped and placed together using 'Paint' I ended up with the following...
To create my Edweard Muybridge vintage photograph I used an 'App' that I'd found on my iPhone.
I took several shots of Gemma seated on the couch and chair, walking into the room and sitting on the carpet.
Then using the Photoshop layering technique, I managed to put all my Gemma's together in the room.
 |
| Multiple Gemma's |
Then I wanted to create another multiple exposure shot of Gemma, but this time blending her together, similar to this image taken from the internet:-
This time I had Gemma sit crossed legged in the middle of the floor, where she simply stretched over her arms, one after the other.
When layered together using Photoshop - I was really impressed with the final result :) :)
 |
| At first I named this 'Gymnastics Gemma' but changed my mind as she reminded me of an 'Indian Goddess'. |
Here's an example of Relander's work:-
This time I used a 'selfie' together with a random tree shot taken outside my college.
Cutting out the unwanted background and foreground parts and changing the colour of my head and shoulders to 'black and white', helped to create the following Relander style image.
I'm really happy with this image, it's simple but striking at the same time.
Gemma with Rooftops and Trees
'Selfie' with Flowers.
'Flower Face Gemma'
Subscribe to:
Posts (Atom)